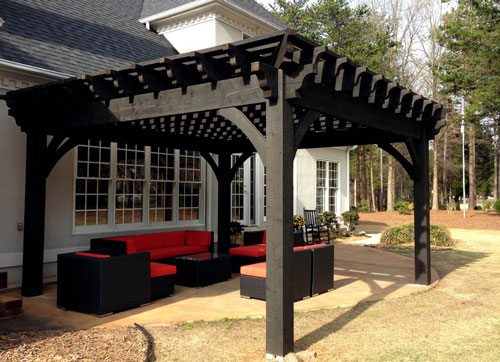

Pergola Installation Time & Tools Checklist: What Determines the Timeline
Across our own documented homeowner installations, on-site assembly has run from 4.5 hours to 3 days, with most inside a single day. That figure covers assembly only — not foundations, permitting or site preparation, which is where much of the schedule actually goes. Pergola installation time depends far more on crew, substrate and how much was pre-cut than on square footage.
Size matters, but it does not set the schedule by itself. A 12×16 that bolts together on an existing slab and a 12×16 that needs footings dug below frost depth are the same square footage and a different week.
In a 2024 survey run for Hippo — 1,736 U.S. homeowners who had completed a DIY project within the previous five years — 47% said they had underestimated the time commitment. Pergolas are an easy place to make that mistake, because generic estimates rarely separate assembly time from site preparation, or distinguish one kind of structure from another.
This guide separates those variables so you can compare quotes accurately and plan for the work that happens before the frame goes up.
What “Installation Time” Actually Includes
Most published estimates quietly mean assembly time — the hours between the first post going up and the last fastener going in. That is the number worth knowing, but it is not the number that determines when you can use your patio.
- Assembly time. Raising and fastening the structure itself.
- Site-preparation time. Footings, excavation, concrete and cure time; confirming a slab or deck can carry the load.
- Total project timeline. Both of the above, plus permitting, delivery scheduling and any weather delay.
When you compare two quotes, check which of the three each one is describing. That single question resolves most of the confusion around pergola timelines.
Three Kinds of Pergola, Three Different Schedules
The word covers products that have very little in common on install day. Grouping them into two buckets — “kit” and “custom” — is where most timeline estimates go wrong.
Lightweight bolt-together kit
Aluminum or vinyl, hollow sections, numbered instructions and bagged fasteners. Light enough that two people can handle a full side. Usually anchored to whatever is already in place.
Field-cut timber construction
Solid timber cut, fitted and adjusted on site. Every joint is worked in the yard, so the labor scales with the number of connections. This is the category that gets quoted in days rather than hours, and the reason big timber jobs have long schedules.
Precision pre-cut timber kit
Also solid timber and also custom — but the joinery is cut in a shop before anything ships. Site work becomes assembly rather than fabrication. Western Timber Frame™ components arrive pre-cut, pre-drilled, labeled and pre-stained, so the crew is assembling rather than fabricating. What that has meant in practice is set out in the documented installations below.

“Custom” and “cut on site” are not the same thing, and conflating them is what makes heavy timber look slower than it needs to be.
What Our Own Installs Actually Took
Rather than offer a category average, here are documented Western Timber Frame™ installations — homeowner builds, with the size, substrate, crew and time as recorded at the time.
| Project | Size | Setup | Crew | Assembly time |
|---|---|---|---|---|
| Horn — WA | 14′×14′ pergola | Attached to house | 3 people | 4.5 hours |
| Farrell — CA | Event-grade pavilion | Freestanding | Solo | 4–5 hours |
| Abelin — CA | 12′×40′ step-tier pergola | Concrete patio, freestanding | Family crew | About 6 hours |
| Engineer review build | Pavilion | Freestanding | 4 people | About 7 hours, including a plywood roof layer |
| Williams — FL | 12′×16′ cedar pergola | Backyard patio, freestanding | 2 people | One afternoon |
| Mullin — KY | 10′×14′ cedar pergola | Patio, freestanding | 3 people | 3 days |
Sources: five documented homeowner installs, a structural engineer’s own build, and a solo pavilion install. None of these builders had assembled one of our kits before.

What the numbers actually show
Look at the two ends of that table. The largest structure on it — a 12′×40′ step-tier pergola — went up in about six hours. The smallest, a 10′×14′, took three days.
That is the whole argument of this article in two rows. Footprint is not what sets the schedule. Crew size, experience and how the day is organized matter far more, and a pre-cut kit removes the variable that would otherwise punish a small crew: there is no cutting or fitting to get wrong on site.
Across these builds, assembly ran from 4.5 hours to 3 days. Most landed inside a day. We would not promise an afternoon on any particular project, because the evidence does not support it — but the range is narrow enough, and the bottom of it low enough, that it is worth knowing before you plan a week off.

How That Compares With Other Structures
For context, here is how the wider market tends to quote assembly time. We do not install aluminum kits or field-cut timber, so these are general ranges rather than figures we have measured — useful for framing questions to whoever is quoting you.
| Size tier | Bolt-together kit | Field-cut timber |
|---|---|---|
| Lounge — 10×10 to 12×12 | 1–2 days | 1–2 days |
| Family — 12×16 to 12×20 | 2–3 days | 2–4 days |
| Entertainment — 16×16 and up | 3–4 days | 4–6 days |
The shape of the right-hand column is the part worth understanding. Field-cut time climbs with size because every added joint is measured, cut and fitted in the yard, so the labor scales with the joint count. When the joinery is finished in a shop before delivery, that scaling largely disappears — which is why a 12′×40′ can go up in a day while a smaller field-cut structure takes several.
Foundations: What the Posts Land On
Foundation work is one of the most consequential variables in the whole schedule, and it is usually settled before anyone picks up a tool. What the posts land on decides both the timeline and the hardware.
| Substrate | What it means for the schedule | What to confirm first |
|---|---|---|
| Existing concrete slab | May remove new-footing cure time from the schedule entirely. | Thickness, reinforcement, edge distance, condition and load capacity — suitability has to be established before you plan around it. |
| Deck | Time goes into locating structure, not fastening. | Posts must land on structural beams rather than decking boards, and the framing below has to carry the added load. |
| Soil or grass | Adds excavation, pour and cure time. This is the case that most often turns a one-day install into a multi-day one. | Local frost depth, footing size and spacing per the approved plan. |
| Pavers | Adds footing work underneath, plus cutting and relaying pavers around them. | The anchor has to reach an engineered structural substrate — not the paver itself and not the sand or gravel bedding it sits on. |
Concrete and cure time
Fresh concrete gains strength over time, and how much time depends on the mix, the temperature, the footing design, the anchors and the load being applied. Conventional design strength is specified at 28 days, and elapsed hours alone do not establish that a footing is safe to load.
So the rule worth following is not a number from an article. Do not load or anchor into new concrete until the required strength or waiting period has been confirmed by the plans, the engineer, the concrete supplier and the anchor manufacturer. Where a project schedule shows a wait of a couple of days between pour and assembly, that figure comes from those sources, not from a general rule of thumb.
Frost depth is equally local — effectively nothing in parts of the South, several feet across the northern states — and it is not something to estimate by eye. Water in soil expands as it freezes and lifts whatever sits above it, so a footing poured above frost depth in a cold climate gets pushed up over winter and does not settle back. Posts tilt, beams rack, and the structure goes out of square a season at a time. Our engineering and permitting page covers how footing depth gets determined for a specific address.
Crew Size, Member Weight and Lifting
There is no universal crew number, because the real answer depends on what the pieces weigh. Western Timber Frame’s published guidance is that some kits go up in an afternoon with two or three people; larger, taller or attached structures need more hands or mechanical lifting.
The variable that matters is piece weight, and it is worth checking rather than assuming. A long 8×8 timber can exceed 100 pounds on its own, and a main beam is longer, heavier and considerably more awkward to control. OSHA’s guidance on safe manual lifting points to the NIOSH lifting equation, which sets a maximum of 51 pounds for a one-person lift under ideal conditions — then adjusts that figure down for how far the load is from the body, how high it is lifted, and any twisting involved. Overhead, at arm’s length, on uneven ground, the realistic limit is well under that. Most structural timbers are past it.
Before install day, work out three things: the actual weight of the heaviest piece, how many capable helpers you will have, and whether a lift, a tripod hoist or scaffolding is needed. A third person also changes the job qualitatively — two can steady a post while the third checks plumb and drives the fastener, instead of one person doing two jobs at once.
Typical Tools and Safety Equipment
This covers most installs. It is not a substitute for the approved assembly instructions for your structure, which govern — and which will list anything project-specific.
Layout
- Tape measure, chalk line and string line
- A 4-foot level, which reads plumb over the length of a post more reliably than a short one
- Stakes for setting the footprint before anything is dug or drilled
Fastening
- Impact driver and socket wrench set
- Drill with wood bits; a hammer drill and masonry bits where the structure meets concrete
- Torque wrench where the plan specifies fastener torque
- Rubber mallet, for seating joinery without bruising the timber
Safety and support
- Safety glasses, gloves and a hard hat where anything is being lifted overhead
- A ladder rated for the load, or scaffolding at beam height
- Temporary bracing to hold posts plumb before the frame is fastened
- Fall protection and mechanical lifting equipment on taller or heavier structures
Hardware, and why the post base matters
Tools get the structure up; hardware decides how it holds up. Exposed end grain at the base of a post is particularly vulnerable, because end grain wicks moisture: a timber standing in direct contact with concrete draws water upward and stays damp after the surface has dried, so decay can begin low and hidden.
The mechanism that addresses it is separation — hold the timber clear of the footing and give water somewhere to go. Concealed structural knife plates do that while carrying the structural connection. Western Timber Frame’s standard EarthAnchor™ system is one implementation: a concealed, corrosion-resistant aluminum knife plate that holds the timber off the footing and isolates the end grain from concrete. Our explanation of why pergola posts rot covers the mechanism in more detail. Whatever hardware you end up with, that is the function to ask about.
Alongside it, plan for engineer-grade lags in the lengths the connections specify, and concrete anchors rated for the substrate.
What Adds Days to an Install
- Dissimilar metals in a wet joint. Where different metals meet with moisture present, one can corrode faster than it would alone. It is a solvable problem, not an automatic failure — it is handled with compatible coatings, isolation, or hardware specified for the assembly. Use what the plan calls for rather than what the hardware store has.
- Loading concrete before it is ready. Covered above, and worth repeating because it is the one that causes permanent problems rather than temporary ones. Uneven settling or cracking at the footing is inherited by everything built on top of it.
- Footings placed without confirming depth or location. A footing in the wrong place or above frost depth can mean redesign, correction or replacement — all of which cost more than checking would have.
- An unconfirmed substrate. Anchoring hardware depends on what the posts land on. Discovering at delivery that a slab is too thin or a deck cannot take the load brings the install to a stop.
- Weather. Wind halts work rather than slowing it, because raising beams in a gust is not safe. Rain affects excavation and concrete; heat shortens how long a crew can safely work. Checking the forecast before committing to a date costs nothing.
- Missing hardware at delivery. Check the packing list the day it arrives rather than the morning you start. One missing bag of structural lags can cost more time than the assembly.
Permits, Engineering and Calling 811
Whether a pergola needs a permit depends on size, height, whether it attaches to the house, and the rules your local authority has adopted. Attached structures are more often in scope, because they become part of the building. Beyond that, the status of any particular project stays unknown until the local building department applies its own rules to it — which is why the useful step is asking them, early, rather than reading a general answer.
The timing matters more than the paperwork. A permit that arrives late is an administrative delay. A footing poured in the wrong place can mean redesign, correction or replacement. Our pergola permit guide walks through how to find out for your address, and the engineering and permitting page covers what goes into a submission — drawings, footing schedule and site plan, with a professional engineer’s stamp added when a jurisdiction requires one.
Separately, and regardless of permit status: call 811 before you dig. It is free, it is the national process for locating buried utilities, and it applies to a post hole as much as to a trench.
Questions to Ask Before You Hire a Pro
Five questions that separate a scoped quote from an estimate.
- Does this quote include foundation work, or only assembly? The most common source of surprise cost.
- What anchoring method are you using, and is it specified for this structure and this substrate? Worth asking for the detail rather than a category.
- Is the timeline based on my size, structure type and site, or on a general estimate? If the number matches the one on their website, you have your answer.
- Who pulls the permit? Either arrangement works; it should be settled in writing rather than assumed.
- What happens if weather delays install day? Ask how rescheduling works before you need it.
The Short Version
Pergola installation time cannot be predicted from square footage alone. The structure’s design and weight, whether it attaches to the house, what the posts land on, how the site can be accessed, the crew and the lifting plan, and how much of the fabrication happened in a shop all affect the schedule.
That is the portable part. Once you know what actually drives the timeline, the same handful of questions works on any company you are considering — and the answers tell you quickly whether an estimate was built for your project or read off a page.
Pergola Install Timing Questions
How long does it take to install a 12×16 pergola?
One documented Western Timber Frame install at exactly that size — a 12′×16′ cedar pergola in Florida, freestanding on a patio, two people — went up in a single afternoon. Our documented builds overall range from 4.5 hours to 3 days, driven more by crew and experience than by footprint. For comparison, the wider market tends to quote 2 to 3 days for a bolt-together kit at that size and 2 to 4 for timber cut on site. All of those are assembly only, excluding foundations, permitting and cure time.
Can one person install a pergola alone?
It has been done — one Western Timber Frame homeowner assembled a pavilion kit solo in about 4 to 5 hours — but it is the documented exception rather than the plan. The NIOSH lifting equation that OSHA points to sets 51 pounds as the maximum one-person lift under ideal conditions, adjusted down for distance, height and twisting, and a long 8×8 timber can exceed 100 pounds. Most of our documented installs used two to four people. Confirm the weight of the heaviest piece and plan the lift before install day.
Do heavy timber pergolas need different tools than aluminum kits?
Mostly the same hand tools, plus more lifting capacity and heavier hardware. Timber work typically adds a rubber mallet for seating joinery, engineer-grade lags in the specified lengths, temporary bracing, and scaffolding rather than a ladder. Aluminum kits often need little beyond an impact driver and a socket set.
How long does concrete need to cure before you build on it?
There is no single safe number. Required strength depends on the mix, temperature, footing design, anchors and the load being applied, and conventional design strength is specified at 28 days. Do not load or anchor into new concrete until the required strength or waiting period has been confirmed by the plans, the engineer, the concrete supplier and the anchor manufacturer.
How do wall-mounted and free-standing pergola installations differ?
A free-standing pergola carries its load on its own posts and footings. A wall-mounted one transfers part of that load into the house, so it needs a ledger fastened into structural framing and flashing detailed to keep water out of the wall. The attachment usually adds time, and attached structures are more often within the scope of a permit.
What tools are needed for DIY pergola assembly?
For layout, a tape measure, chalk line, string line, 4-foot level and stakes. For fastening, an impact driver, socket wrench set, drill with wood and masonry bits, and a rubber mallet. For safety and support, glasses, gloves, temporary bracing and a properly rated ladder or scaffolding. The approved assembly instructions for your structure govern, and may add project-specific items.
How long does a 10×12 aluminum kit take compared with a custom wood pergola?
At that size the general market quotes roughly 1 to 2 days either way. The gap widens with size, because field-cut timber work scales with the number of joints while a bolt-together kit does not — and a pre-cut timber kit largely sidesteps that scaling. One of our documented installs, a 12′×40′ step-tier pergola, went up in about six hours, which is a larger structure than either figure above contemplates.
How does DIY installation time compare with hiring a professional?
Less than people assume, on a pre-cut kit. Our documented homeowner installs ran from 4.5 hours to 3 days, and none of those builders had assembled one of our kits before. The difference between a fast build and a slow one came down to crew size and how the day was organized rather than professional experience. Where a professional crew reliably saves time is on the foundation work, the permitting and the lifting plan.
Want a Timeline for Your Actual Project?
Send us your size, your substrate and a photo of the space. You will get an estimate scoped to the project rather than a category average — including the foundation work, which is the part most quotes leave out.
Get a Free QuoteWith 28 Best of State Awards, multiple Inc. 5000 honors, an HGTV Design Excellence Award, 2026 SBA Utah District Manufacturing Small Business of the Year, and 7,000+ structures built nationwide since 2008, Western Timber Frame is a national authority on custom, structural, handcrafted, real-wood timber frame pergolas and outdoor structures for homeowners who want true craftsmanship, not mass-produced, cookie-cutter kits.
Western Timber Frame™ — Payson, Utah | Since 2008 | 7,000+ structures in all 50 states
2026 SBA Utah District Manufacturing Small Business of the Year | Multiple Inc. 5000 honors | HGTV Design Excellence Award | 28 Best of State Awards