DIY Patio Cover Kits vs. Building From Scratch: Which Approach Is Right for You?
There is more than one way to DIY a patio cover. You can start with raw lumber and handle much of the fabrication yourself, assemble a lightweight ready-made kit, raise a pre-cut heavy-timber structure, or bring in a professional crew for the installation.
The biggest difference isn’t simply price. It’s how much design, fabrication, problem-solving, and assembly you want to take on yourself. This guide compares those approaches, explains what changes from one method to another, and helps you decide where you want your part of the build to begin.
Key Takeaways
- The best DIY route depends on what you actually want to do yourself. Some people enjoy measuring and cutting every component. Others want the experience of raising the structure without fabricating it. Neither approach is inherently more “DIY” than the other.
- DIY doesn’t have to mean starting from raw lumber. There is a meaningful difference between fabricating a structure and assembling one that has already been designed and cut.
- There are several ways to approach a DIY patio cover. Scratch-building, lightweight ready-to-assemble kits, pre-cut timber frame kits, and professional installation each put different parts of the project in your hands.
- Engineering and installation are two different jobs. A homeowner can assemble a structure while the structural design, load requirements, and timber fabrication are handled beforehand.
- Local requirements matter. Permits, wind, snow, foundations, setbacks, and other requirements can vary by location. The plans and engineering for the specific project should guide the build.
- A pre-cut kit reduces on-site fabrication. With a Western Timber Frame kit, the structural timbers and joinery are prepared before shipment, allowing the installation to focus more on layout and assembly.
Already know you want to build it yourself? If you’ve moved past choosing a DIY method and are ready to understand the actual construction sequence, see our step-by-step guide to building a DIY patio cover . It walks through the project from planning and site preparation through posts, beams, rafters, roofing, and final checks.
The Real DIY Question: What Are You Actually Building?
Most DIY patio cover articles start with a tool list and a lumber run. That skips the question that determines whether the project takes an afternoon or a month: are you engineering a structure, or assembling one that has already been engineered? (If you are still deciding what kind of structure to build, start with our pergola, pavilion, or gazebo comparison guide — the structure type determines the build method.)
A scratch-build from lumber yard materials means you are the engineer. You are calculating spans, selecting species, sizing rafters, cutting joints, and hoping everything is square when you bolt it together. That is a real skill, and people who have it build beautiful things. But most families looking up “DIY patio cover” are not looking for a carpentry apprenticeship. They want the cover.
Pre-engineered kits exist because the engineering can be done once, done right, and shipped to your driveway. The question is what kind of kit — and that is where the differences matter.
Four Ways to Build a DIY Patio Cover
People comparison-shop patio covers the way they comparison-shop toasters — by sticker price. But a patio cover is not a toaster. It is the thing above your family’s head for the next twenty years. The most expensive patio cover is the one you replace. The second most expensive is the one you settle for — the one that works fine but never quite feels like the space you had in mind. Here are the four ways to build one, and what each choice actually buys you.
Option 1: Build a Patio Cover From Scratch
This is DIY in its most traditional sense. You buy dimensional lumber—such as 2x6s, 2x8s, and 4×4 or larger posts—then measure, cut, prepare, and assemble the structure on site using your own plans or professionally prepared plans.
For someone who enjoys the entire building process, that can be rewarding. You have control over material selection, details, and fabrication, and depending on the design and materials you choose, purchasing raw lumber can reduce the upfront material cost compared with a pre-cut system.
It also puts more of the project in your hands.
A patio cover has to do more than look square and stand upright. Post locations, beam and rafter sizes, connection strength, footings, anchors, roof loads, wind, snow, drainage, weather exposure, and local building requirements can all affect the finished structure.
That doesn’t mean building from scratch means doing your own engineering. A DIY builder can—and often should—work from plans and engineering appropriate for the structure and site. The distinction is that the measuring, cutting, fitting, and much of the problem-solving still happen in your shop or on the jobsite.
What to Expect
Material cost: Often one of the lower-cost ways to acquire the raw structural materials, but the final cost depends heavily on size, lumber species and grade, roofing, hardware, engineering, tools, finish, and local material prices.
Time: Usually the most time-intensive DIY route because fabrication happens before and during assembly. The project may extend across multiple weekends depending on its complexity, your experience, and how much help you have.
Skill level: Intermediate to advanced carpentry skills may be needed, particularly for larger structures, structural connections, roof framing, and more complex designs.
Tools: In addition to ordinary installation tools, you may need equipment for accurately laying out and cutting larger structural members and connections.
Longevity: There isn’t a meaningful universal number. Species and grade, structural design, connection details, protection from moisture, finish, maintenance, climate, and workmanship can all influence how a structure performs over time.
Who Is This Route Best For?
Building from scratch makes sense for someone who enjoys fabrication as much as assembly. If measuring timbers, making structural cuts, working through construction details, and spending time in the shop are part of what makes the project enjoyable, this may be exactly the kind of DIY experience you’re looking for.
But if the part you’re looking forward to is raising the structure rather than fabricating it, a pre-cut kit offers a different kind of DIY.
Option 2: Buy a Lightweight Patio Cover Kit
Another DIY route is a ready-to-assemble patio cover kit from a home-improvement store or online retailer. These are commonly made from aluminum, vinyl, or other lightweight materials and arrive with most of the primary components already prepared for assembly.
For many homeowners, that’s a practical solution. The materials are relatively easy to handle, there’s less fabrication to do on site, and the initial investment can be lower than a custom heavy-timber structure.
The tradeoff isn’t simply about which material is “better.” It’s about what you’re expecting the finished patio cover to be.
A lightweight kit may be exactly right when the priority is straightforward weather coverage, lower maintenance, a smaller upfront investment, and an installation that doesn’t require handling large timbers.
Where the decision changes is when the structure itself is intended to become a major architectural feature of the home or landscape.
What to Expect
Cost: Often less upfront than a custom heavy-timber structure, although pricing varies considerably with size, material, roofing, manufacturer, shipping, and installation requirements.
Time: Many systems are designed specifically for homeowner assembly, but installation time depends on the kit, site preparation, foundation or anchoring requirements, and the number of people helping.
Skill level: Varies by system. Pre-cut components can reduce fabrication, but accurate layout, anchoring, weatherproofing, and following the manufacturer’s installation requirements still matter.
Maintenance: Aluminum and vinyl systems can appeal to homeowners who want relatively little finish maintenance. The manufacturer’s care instructions should guide upkeep.
Appearance: These systems generally create a different architectural effect than heavy timber. Whether that’s an advantage depends entirely on the home and what you want the outdoor space to become.
Who Is This Route Best For?
A lightweight kit can make sense when your priorities are practical coverage, manageable components, lower initial cost, and a relatively straightforward DIY project.
But some homeowners are looking for something different. They want the patio cover itself to carry visual weight—to feel less like something placed over the patio and more like part of the architecture.
That’s where a heavy-timber kit becomes another kind of DIY option.
Option 3: Assemble a Pre-Cut Timber Frame Kit
There is a middle ground between building everything from raw lumber and hiring someone to build the entire structure for you.
A pre-cut timber frame kit moves much of the complicated work off the jobsite. The structure is designed and engineered first. The timbers are then cut and prepared before they arrive, so the work at home is primarily about putting the pieces together rather than fabricating them from scratch.
That’s still DIY. It’s simply a different part of the building process.
With a Western Timber Frame kit, the heavy timbers are CNC-cut before shipment, including the interlocking connections used in The Dovetail Difference®. Rather than measuring and cutting structural joinery in your driveway, you’re assembling timbers that have already been prepared to fit their intended locations.
That changes the experience of the project considerably.
You still lay out the structure, work with substantial timbers, raise posts and beams, make the connections, and watch the structure take shape. But you aren’t starting with a pile of raw lumber and trying to reproduce the joinery yourself.
What to Expect
Design and engineering: The structure is designed before fabrication, with engineering based on the project requirements. Site conditions and local requirements still matter, so the plans and engineering for the specific project should guide installation.
Fabrication: Structural timbers are cut and prepared before shipment. This removes much of the measuring, layout, and joinery cutting that would otherwise happen on site. Western Timber Frame prepares every timber and connection to fit one intended location, so a patio cover assembles without layout work.
Assembly: These are heavy-timber structures. Pre-cut joinery simplifies how the pieces fit together, but the size and weight of the timbers still require planning, appropriate equipment when needed, and enough capable help for a safe installation.
Customization: A pre-cut kit doesn’t have to mean choosing a standard structure from a box. Size, roof style, layout, timber details, stain, and other options can be designed around the project. Western Timber Frame prepares every kit with the cuts and notches completed before shipping.
Finish: Timbers can arrive prepared and finished according to the project specifications,reducing another portion of the work that would otherwise need to happen before or after assembly. Western Timber Frame sources its Douglas Fir at #1-or-better grade directly from the mill.
What Does the Kit Actually Include?
This is an important question because the word kit can mean very different things from one company to another.
A Western Timber Frame kit is the prepared timber structure and the components specified for that particular project. Before ordering, make sure you understand exactly what is included, what will arrive with the shipment, and what work or materials will still need to be handled locally.
Depending on the project, site preparation, concrete, roofing materials, equipment, permits, or other work may be separate from the timber package. Your project documents should identify what applies to your structure.
Who Is This Route Best For?
A pre-cut timber frame kit makes sense for someone who wants to participate in building the structure but doesn’t necessarily want to fabricate the structure.
Maybe you want to be there when the first post goes up. You want to help set the beams, see the joinery come together, and eventually stand beneath something you had a hand in building.
You just don’t particularly want to spend the weekends beforehand calculating cuts and making structural joints.
That’s the useful distinction.
Building it yourself doesn’t have to mean starting from scratch.
Option 4: Have the Patio Cover Professionally Installed
Not everyone who loves the idea of a timber patio cover wants a construction project.
You may enjoy working with your hands but simply not have the time. You may be comfortable with smaller projects but not with raising heavy timbers. Or you may want to be involved in the design decisions and leave the installation to an experienced crew.
Professional installation lets you do exactly that.
The design, engineering, site conditions, and installation requirements still need the same careful attention. The difference is who takes responsibility for putting the structure together on site.
What to Expect
Cost: Professional installation adds labor and potentially equipment, travel, or site-related costs to the project. The amount depends on the structure and installation conditions.
Time: An experienced crew can often complete the structural installation more efficiently than a first-time DIY builder, although the schedule still depends on the project, site preparation, weather, roofing, inspections, and other work involved.
Skill required from you: Very little during installation. Your involvement can remain focused on the decisions that shape the finished space rather than the physical construction.
Heavy lifting: The crew handles the raising and assembly of the timber structure, including the planning and equipment required for substantial posts and beams.
Who Is This Route Best For?
Professional installation makes sense when you want the finished structure but don’t particularly want the installation project that comes with it.
And there’s nothing less meaningful about that.
The satisfaction of an outdoor space doesn’t depend on who tightened the bolts. It comes later—when the tools are gone, the furniture moves in, and the space starts becoming part of everyday life.
The real decision isn’t whether DIY is better than professional installation.
It’s which parts of the project you want to own yourself.
Side-by-Side: Four DIY Methods Compared
|
Scratch-Built Wood |
Lightweight Kit |
Pre-Cut Timber Frame Kit |
Contractor-Built |
|
|---|---|---|---|---|
|
Cost Range |
Usually lower for raw materials; varies by lumber, size, roofing and hardware |
Often a lower-cost kit option; varies by material and manufacturer |
Higher initial investment; varies by size, roof style and customization |
Varies widely by materials, design and labor |
|
Project Time |
Usually the longest DIY route because fabrication happens on site |
Often designed for relatively quick homeowner assembly |
Fabrication is completed before delivery; installation time varies by structure and site |
Depends on contractor schedule, site work and project complexity |
|
Skill Level |
Intermediate to advanced carpentry may be needed |
Varies; many are designed for homeowner assembly |
Pre-cut joinery reduces on-site fabrication; heavy-timber assembly still requires planning and capable help |
Installation handled by professionals |
|
Engineering |
Depends on the plans and project |
Manufacturer specifications and applicable engineering |
Engineered for the specific structure and project requirements |
Depends on the contractor, plans and project |
|
Finish |
Selected and applied by the builder |
Typically factory-finished |
Timbers can arrive pre-stained and prepared for assembly |
Varies by contractor and material |
|
On-Site Fabrication |
Highest—measuring, cutting and fitting are part of the build |
Usually limited |
Structural timber cutting and joinery are completed before shipment |
Handled by the contractor |
|
Longevity |
Depends on design, species, workmanship, exposure and maintenance |
Depends on material, product, exposure and maintenance |
Heavy timber designed for long-term outdoor use; maintenance and exposure still matter |
Depends on materials, design and workmanship |
|
Wind Engineering |
Depends on the engineering for the project |
Varies by manufacturer and product |
Engineered for 115 mph wind as standard, and higher when local code requires it |
Depends on the engineering for the project |
Planning Your DIY Patio Cover: Permits, Size, and Placement
Before you order lumber or a kit, spend some time on three decisions that will shape almost everything that follows: where the patio cover will go, how large it should be, and what your local building department requires.
It is much easier to adjust a plan on paper than to discover after materials arrive that a post lands in the wrong place, the roof interferes with a window, or the structure needs different engineering for your location. If you’re still working out the dimensions, our step-by-step pergola size guide can help you plan around furniture, walking space, post placement, and how you actually want to use the area.
Do You Need a Permit?
Maybe. Permit requirements vary by state and local jurisdiction, so this is something to check before ordering materials or beginning site work.
The International Residential Code (IRC) Appendix H provides model provisions for patio covers, but your state or local jurisdiction may adopt, amend, or apply those provisions differently.
Rather than assuming a particular square-foot threshold applies to your project, contact your city or county building department and ask what is required for your address. Be prepared to discuss the structure’s size, location, whether it is attached or freestanding, roof type, setbacks, foundations or anchors, and applicable wind and snow loads.
Western Timber Frame packages can be engineered for the requirements of the project. Standard packages are engineered for 115 mph wind. Where local code requires more, the structure is engineered to meet the higher requirement.
Size the Space for What Will Happen Under It
It’s easy to choose the dimensions of a patio cover by measuring the concrete that’s already there. But the existing patio isn’t necessarily the best guide to how large the covered space should be.
Think about what will actually happen underneath it. A dining table needs room for chairs to pull back. An outdoor kitchen needs working space. Walkways need to remain comfortable when people are seated. Doors need room to open. And a structure intended for larger gatherings may need more covered area than the patio originally provided.
Planning around people rather than just measurements can make a noticeable difference in how the finished space feels.
Attached or Freestanding?
An attached patio cover and a freestanding patio cover can create a similar outdoor room, but structurally they are different projects.
An attached design interacts with the house, which means the structural connection and water management at that connection need to be resolved correctly. A freestanding structure carries its loads through its own posts and foundations or anchoring system.
Western Timber Frame builds both configurations. Where the site and design allow, posts can also be placed near the house so the primary roof loads are carried down through the timber structure rather than relying on the house for the main vertical support.
What Actually Ships in a Timber Frame Kit
The word kit can mean very different things. Some kits arrive as a collection of standard parts that still require considerable measuring, cutting, and fitting on site. A Western Timber Frame kit is prepared differently: much of the fabrication work is completed before the timbers ever reach your property.
Your package is prepared for your specific structure, so the exact contents depend on the project. A typical Western Timber Frame package may include:
- Heavy timber posts, beams, rafters, and other structural members cut for the specific design.
- Pre-stained timbers in the selected finish, so staining the primary timber structure does not become another job after delivery.
- The Dovetail Difference® joinery, CNC-cut into the timbers before shipment so the primary connections are already prepared for assembly.
- Structural hardware and connections specified for the structure.
- Detailed assembly plans showing where the prepared components belong and how the structure goes together. Western Timber Frame answers assembly questions by phone while a homeowner raises the patio cover.
- Roof components specified for the project. What is included depends on the roof system and package, so review your project documents to see which roofing components are supplied and which materials will be sourced locally.
Which Timber Species Are Available?
Douglas Fir is the standard timber species used for most Western Timber Frame structures. Other species, including Coast Redwood and Cedar, may be available depending on the project, location, and design requirements.
The species isn’t simply a cosmetic choice. Appearance, exposure, climate, availability, structural requirements, and the way you want the finished structure to look can all be part of that decision.
What Still Happens at Your Home?
Pre-cut doesn’t mean the structure builds itself. It means much of the measuring, cutting, and timber joinery that would normally happen during a scratch build has already been completed.
At the site, the work shifts toward layout and assembly: placing posts, raising beams and rafters, making the prepared connections, checking the structure as it goes together, and completing the roof system according to the project plans.
These are substantial heavy-timber structures. The number of people, tools, and lifting equipment needed will depend on the size and design of the structure. Follow the assembly plans for your particular project rather than assuming every timber frame kit installs the same way.
If you’d like to see what this looks like on a real project, take a look at this 5-post 20×20 pergola kit with lattice panels. It shows both the timber package and the completed structure.
Why Pre-Cut Joinery Changes the Build
One of the biggest differences between building from raw lumber and assembling a prepared timber frame kit is what happens before the materials reach your property.
In a scratch build, the connections still have to be laid out, measured, cut, checked, and fitted on site. With a Western Timber Frame kit, that work is done during fabrication. The timbers are CNC-cut so the structural connections are already shaped before the package ships.
That matters because large timbers leave much less room for improvisation than smaller dimensional lumber. A connection that has already been designed and cut for its intended location removes a substantial part of the fabrication work from the DIY installation.
The Dovetail Difference®
Western Timber Frame uses The Dovetail Difference®, our patented interlocking timber joinery system. At the primary connection, the timbers lock together through the joint itself rather than depending on exposed brackets, bolts, or hangers to create the connection.
In load testing commissioned by Western Timber Frame, a dovetail joint reached 11,055 pounds of tested joint strength, with approximately 500% greater strength and load capacity than the standard fasteners used for comparison.
For a DIY builder, though, the advantage isn’t only the strength of the connection. It’s also what you don’t have to fabricate at home.
The complicated joint has already been cut. The connection locations have already been established. Instead of trying to reproduce structural joinery in your driveway, you can concentrate on correctly assembling the structure according to the plans.
Precision Before the Structure Arrives
CNC fabrication allows the timber components for a project to be cut consistently from the digital design before they reach the jobsite. That doesn’t eliminate the need for careful installation. Foundations and anchors still have to be correctly located, timbers still have to be raised safely, and the structure still needs to be assembled according to its plans.
What it does eliminate is much of the measuring, cutting, and fitting that would otherwise have to happen during a scratch build.
That’s an important distinction when deciding what kind of DIY project you want. You can still have the experience of raising a real heavy-timber structure without having to fabricate every structural connection yourself.
Choosing the Right Wood for Your Patio Cover
The timber species affects more than the color of a finished patio cover. Grain, appearance, exposure to moisture, availability, structural requirements, and the way the wood takes a finish can all play a part in choosing the right material for a project.
Douglas Fir
Douglas Fir is the standard timber species for most Western Timber Frame structures. It combines the strength needed for substantial timber framing with a beautiful natural grain that takes stain well.
It is also one of the reasons our structures have such a different presence from patio covers built with smaller dimensional lumber. The larger posts, beams, rafters, braces, and exposed joinery allow the timber itself to become part of the architecture.
Coast Redwood
Coast Redwood may be considered for projects where moisture exposure, climate, appearance, or other project requirements make it a good fit. Redwood is naturally resistant to decay and has long been valued for outdoor applications.
Because every project is different, timber species should be selected as part of the overall design rather than by climate alone.
Cedar
Cedar is another species available for certain projects. It has its own grain, color, and natural characteristics and may be considered where the project conditions and desired appearance make it appropriate.
If you’re unsure which species makes sense, you don’t need to solve that before beginning your design. The structure, location, exposure, engineering requirements, and the look you want can all help narrow the choice.
Look at More Than the Species
When comparing patio covers, timber species is only part of the story. Look at the dimensions of the posts and beams, the roof members, braces, connection points, joinery, finish, and overall proportions of the structure.
Those details affect how a patio cover feels once it is standing beside your home. A structure can provide perfectly functional shade and still have a very different architectural presence depending on the materials and proportions used to build it.
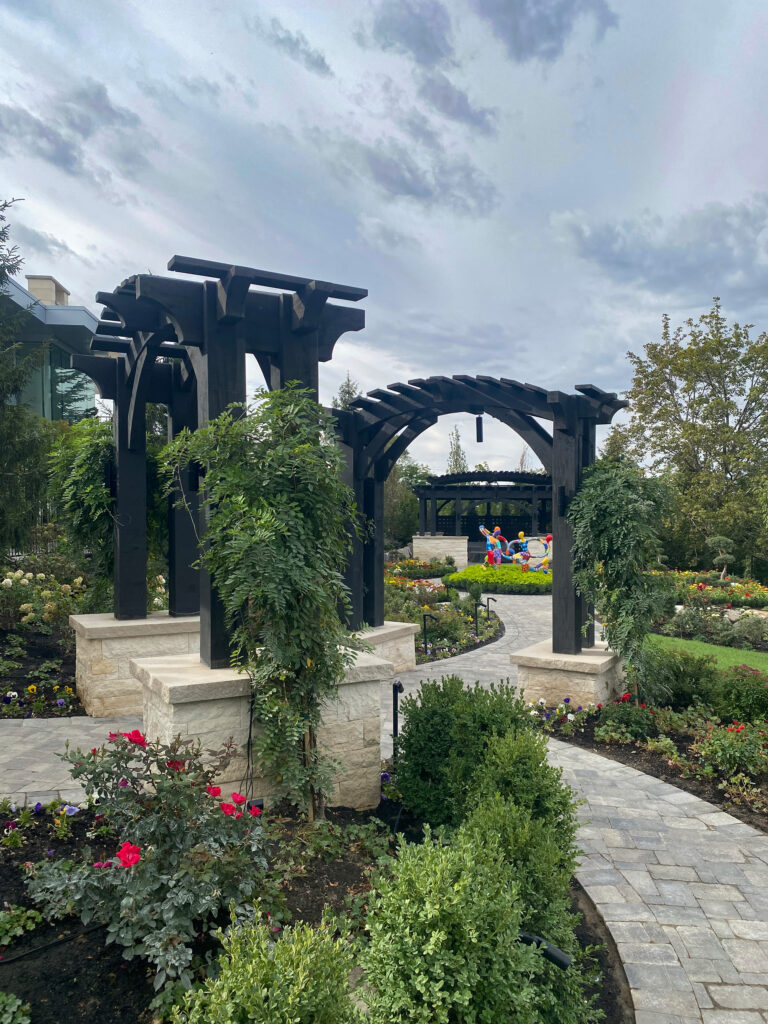
That’s why photographs of completed projects can be so useful. Don’t look only at the roof. Look closely at how the structure meets the home, how substantial the timbers appear in the space, how the connections are handled, and whether the finished structure feels appropriate for the architecture around it.
What You Put Overhead Changes the Space Below

A patio cover isn’t only about creating shade. The roof above you changes how the space below feels and how you can use it.
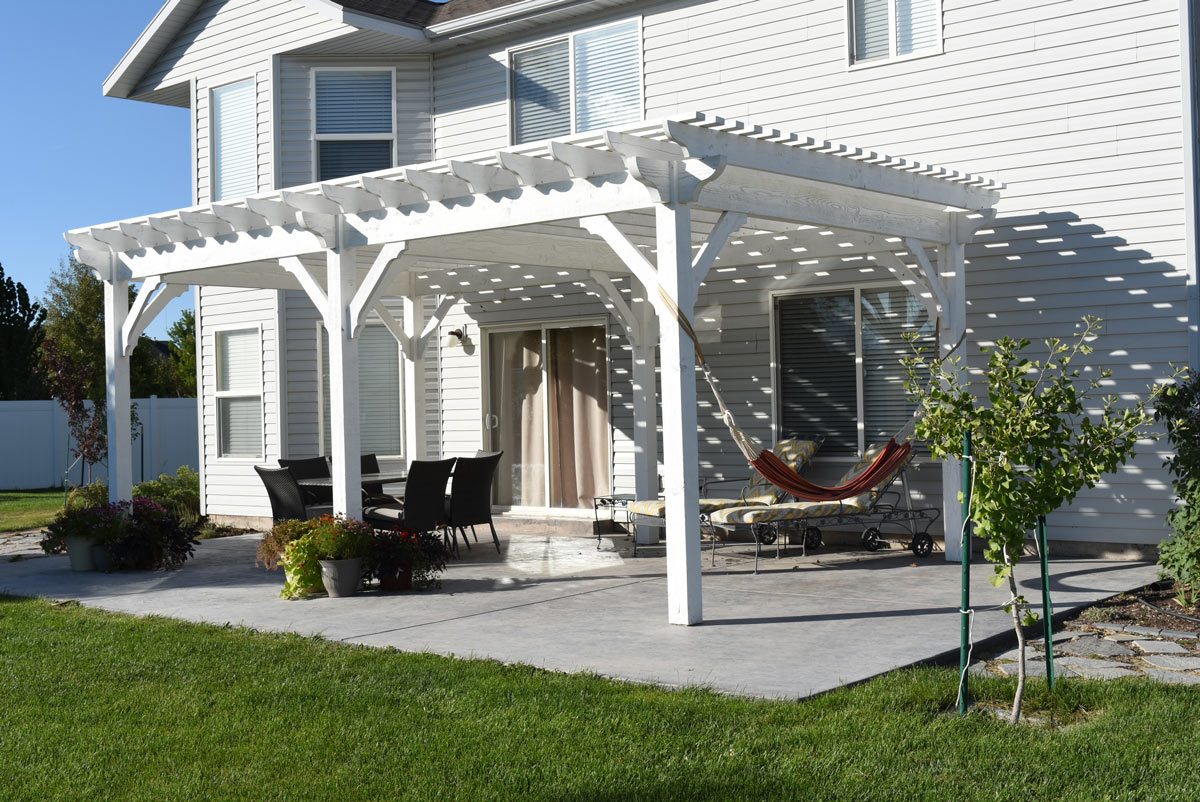
An open pergola keeps you connected to the sky while its overhead timbers create changing patterns of sun and shade. A solid-roof pavilion or patio cover provides more complete overhead protection. Translucent roofing, such as polycarbonate, can provide rain coverage while allowing daylight to remain part of the space.
There isn’t one roof style that’s right for every patio. Think about when you use the space, where the strongest sun comes from, whether rain protection matters, how much natural light you want to keep, and what you plan to do underneath the structure.
If shade is your main priority, our guide to designing a pergola for the right balance of sun and shade explains how orientation, overhead design, and the movement of the sun can influence the space below.
If you want rain protection without making the patio feel as dark as some solid roof systems can, see our polycarbonate pergola roof panel guide for a comparison of clear, bronze, tinted, corrugated, and multiwall options.
The goal isn’t simply to put something overhead. It’s to choose the kind of coverage that supports the way you actually want to use the patio.
Questions That Come Up Before You Build
Can I Really Build a Patio Cover Myself With No Construction Experience?
It depends on what you’re building. Starting from raw lumber and fabricating a patio cover requires a different level of skill than assembling a structure that has already been designed and cut.
A pre-cut timber frame kit removes much of the on-site measuring, cutting, and joinery work, but these are still substantial structures. You’ll need to follow the plans carefully, prepare the site correctly, and have enough capable help and appropriate lifting equipment for the size of the timbers involved.
Some homeowners have completed surprisingly fast installations. In one Western Timber Frame project, Karen Reynolds and her brother assembled their pergola in about 3.5 hours. That’s a real project example, not an installation-time promise. Every structure and site is different.
How Much Does a DIY Patio Cover Cost?
There isn’t one useful price range for every DIY patio cover. A small structure built from dimensional lumber, a lightweight aluminum kit, and a custom heavy-timber patio cover are very different projects.
Size, timber or material choice, roof style, engineering, hardware, finish, shipping, site preparation, equipment, and installation can all affect the final cost.
If you’re trying to understand what goes into pricing a timber structure, see our guide to the factors that affect pergola and pavilion kit pricing.
Do I Need a Permit for a DIY Patio Cover?
Maybe. Permit requirements depend on your state, city or county, the size and location of the structure, whether it is attached or freestanding, and the codes adopted in your area.
Don’t assume that a square-foot exemption you’ve seen online applies to your project. Contact your local building department before ordering materials or beginning construction and ask what is required for your address.
Is a Wood Patio Cover Cooler Than Aluminum?
Wood and aluminum behave differently when exposed to sunlight, but the comfort of the space below a patio cover depends on much more than the framing material alone.
Roof type, shade coverage, orientation, airflow, panel color, surrounding hardscape, time of day, and climate can all affect how the space feels. Instead of choosing a patio cover based on one material-temperature claim, think about the entire roof and shade design.
Will a Patio Cover Add Value to My Home?
A well-designed outdoor living space can add usefulness and appeal to a property, but there isn’t a universal percentage of the project cost that every homeowner will recover at resale.
The result depends on the project, home, market, quality of construction, and what buyers in that area value. A structure that suits the home and gets used well is the version most likely to matter to a buyer.
What About Wind? Will a DIY Patio Cover Blow Away?
Wind resistance isn’t determined by whether a structure is DIY or professionally installed. It depends on the engineering of the entire structure, including the roof, beams, posts, connections, anchors, and the way those loads are transferred to the foundation.
Western Timber Frame standard packages are engineered for 115 mph wind. Where local code requires more, the structure is engineered to meet the higher requirement.
That’s also why installation matters. A structure should be assembled and anchored according to the plans and engineering prepared for that project rather than relying on a generic installation method.
Your Patio Cover, Your Build
There is something satisfying about looking across the patio at the end of the day and knowing you had a hand in building what is standing there.
For some people, that satisfaction begins with a stack of lumber and the first measurement. They want to make the cuts, work through the details, and build the structure from the ground up.
For others, the part they want to experience is the raising. Setting the posts. Watching a heavy beam settle into place. Seeing the joinery come together and realizing that the pile of timbers that arrived at the house has become a real outdoor room.
And some people would rather leave the construction to someone else and spend their time deciding what happens underneath it when it’s finished.
All three are perfectly reasonable ways to approach the project.
The important thing is knowing which parts of the build you actually want to own yourself. Once you know that, it’s much easier to choose between building from scratch, assembling a prepared kit, or having the structure professionally installed.
Because eventually the tools get put away.
The chairs come out. Someone brings dinner outside. The kids wander through. A Saturday afternoon turns into Saturday evening, and nobody is quite ready to go inside yet.
That’s when a patio cover stops being a building project and starts becoming part of the home.
Want to Build It Yourself Without Starting From Scratch?
If you like the idea of assembling your own patio cover but would rather have the design, engineering, timber cutting, and joinery handled beforehand, a pre-cut timber frame kit may be the right kind of DIY for you.
You can explore our patio cover kits to see how the process works, what can be customized, and what to consider before choosing a structure.
18 Years · 7,000+ Structures · All 50 States
Build It Right the First Time
Western Timber Frame CNC-cuts, pre-notches, and shop-stains its timbers before they leave the shop.
| or Call (877) 870-8755

Western Timber Frame · Payson, Utah
28 Best of State Awards. · Best of Houzz (4 Years) · Inc. 5000 (3 Years)
Built nationwide · Recognized at home
7,000+ outdoor structures built.
One standard of craftsmanship.
Across the United States, Canada and Hawaii.

28 Best of State awards
Designed, manufactured, and crafted in the USA


Projects across all 50 states & Canada