How to Install a DIY Timber Frame Pergola Kit; Prep for Posts 5/12
 Continued from: How to Install a DIY Timber Frame Pergola Kit; Knife Plate Layout 4/12 Now we have got our posts laid out here and out map complete. We’ve drawn up here is the house. The critical post is number 4 because it’s got power drilled through it. So that is one we want to watch. So we have numbered them, one, two, three, four. This here was the highest post. And so we started with that one and you can see that we just minus an eighth off of each additional post.
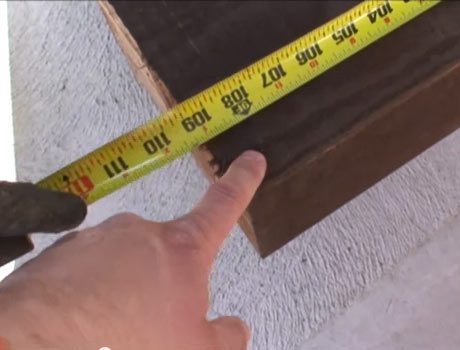 The 42 7/8 is considered 0. Then we just minus 1/8th per post around. We have already marked out our posts here. We have come down and then one is going to be set at nine feet. And then the next post, too, we will just minus an 1/8th off of it. You can see a faint line there. And then so on to the other two taking off an 1/8th.
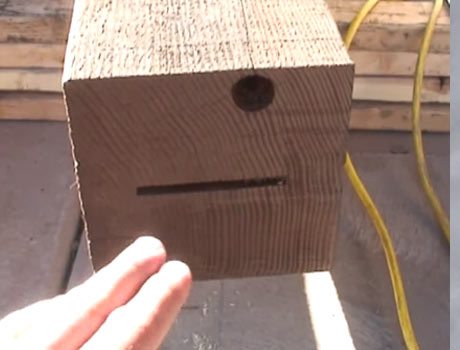
One thing to keep in mind is which direction the knife blade is going. Sometimes it will be crucial to make sure you are installing your knife plate in the same direction that it is precut for you.
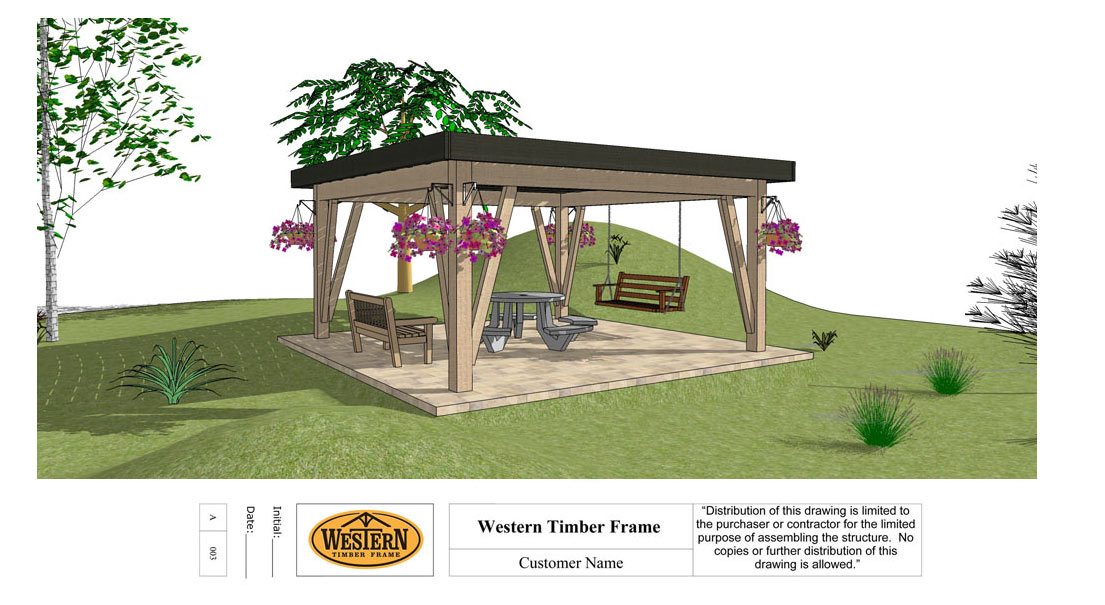
So you note here we get the general height that you know your pergola is going to be and we will leave about 1 1/2 to 2 inches on each post; leaving it that much long so that you can have a little bit of cur off to vary for your concrete or slope in the concrete. And the only reason that we cut these off a different height each one is just to ensure that the top of the roof is perfectly level.
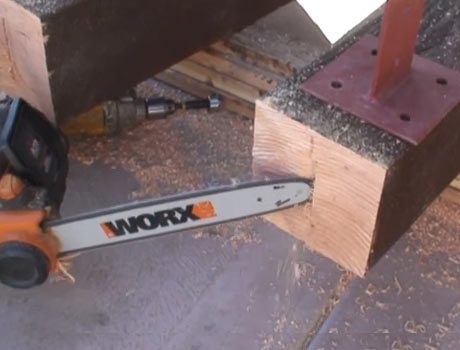
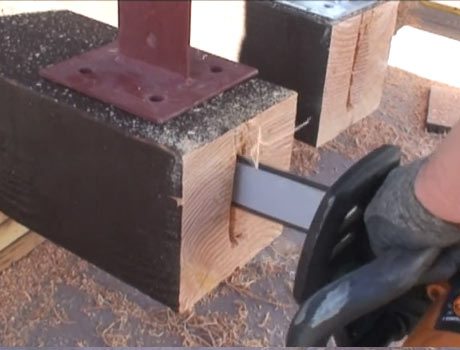
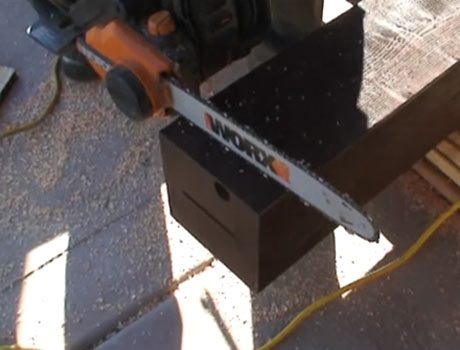 We will show you here the way we cut the posts to give it the best cut is to come down one side first and then drop down the other side to give it a nice, clean cut. And we just tried to use in this case an electric chain saw or we also use the gas chain saws. So either way. We use the teeth on the back of the blade there to grip into the post to help you cut nice and straight.
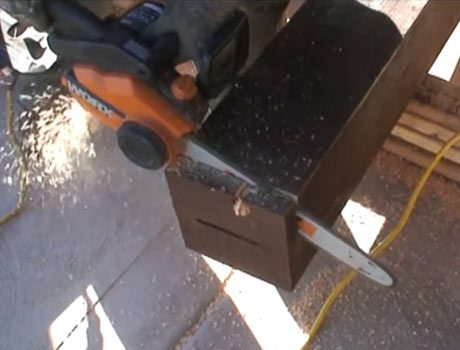
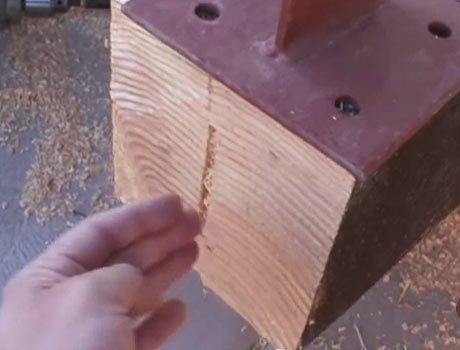
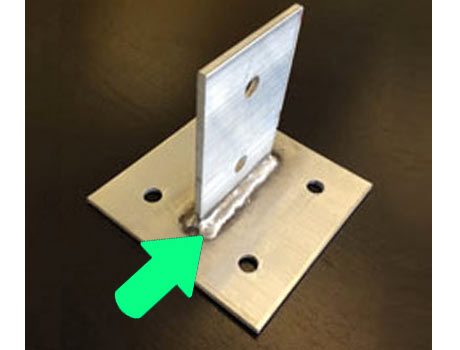
You will also notice that we have already mortised for the knife plate in the post for you. Each knife plate where the blade comes down we have got a weld mark here, it has the weld bead here on both sides. We we just need to accommodate for that. So we are just going to notch this out just a little bit more the accommodate for that weld bead there.

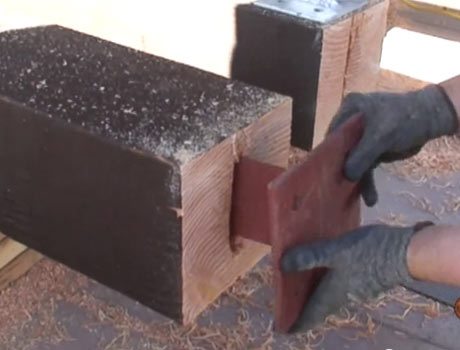 Once that is done we will take the knife plate and we will put the knife blade in and just make sure that it is going to fit. Sometimes you have to hone it out, mortise it out just a little bit more. And we will put the knife plate in before it is bolted to the concrete. We will leave one out just to kind of slide it up and down and make sure it can fit in there completely and still be centered around the post. That works good.
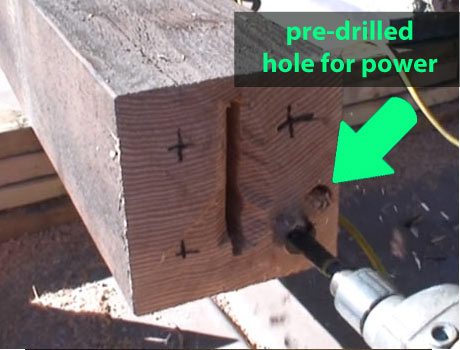 Once we are ready to put the knife plate up and center it on the posts that we have marked. They mark each hole where the bolt is going to be and then we will go ahead and pre-drill those marks so it can drop right over the concrete bolts directly onto the knife plate. This hole here is for the power and this one is for the bolt to drop down over. And right now we are using 1 1/4” recess bit.
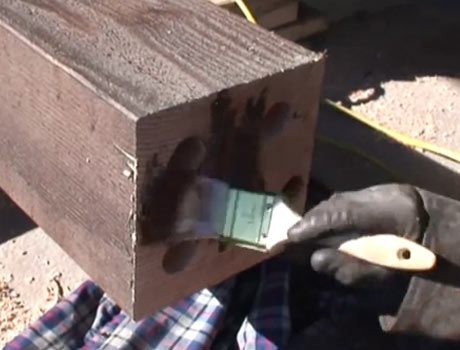 Once we get all this recessed we send out some touch up stain and we drop a little shirt or something so we don’t get it on the concrete.and then we take some of the touch up stain and stain up the bottom of the post so it seals up the bottom as well. So we will get that up so it is completely done and it will be ready to stand.
Continue to:
How to Install a DIY Timber Framed Pergola Kit; Setting the Posts & Beams 6/12
Once we get all this recessed we send out some touch up stain and we drop a little shirt or something so we don’t get it on the concrete.and then we take some of the touch up stain and stain up the bottom of the post so it seals up the bottom as well. So we will get that up so it is completely done and it will be ready to stand.
Continue to:
How to Install a DIY Timber Framed Pergola Kit; Setting the Posts & Beams 6/12
How to Install a Timber Framed Pergola Kit; Time Lapse Installation 1/12
How to Install a Timber Framed Pergola Kit; Getting Started 2/12
How to Install a DIY Timber Framed Pergola Kit; Square Up Posts 3/12
How to Install a DIY Timber Framed Pergola Kit; Knife Plate Layout 4/12
How to Install a DIY Timber Framed Pergola Kit; Prep for Posts 5/12
Our project managers can help you design your timber framed pergola kit. Click HERE or Call Today! 877-870-8755


Leave a Comment