|
|
|
TIMBERVOLT® SERIES POSTS
TimberVolt-Firefly® (Post Drilled to 1 light switch, has metal pipe cover for the top of the post where a wire can be run. 1 box with cover is provided )
TimberVolt-Phoenix® (Post Drilled to 1 light switch and 1 outlet, has metal pipe cover for the top of the post where a wire can be run. 2 boxes and covers are provided)
TimberVolt-Dragon® (Post Drilled to 1 light switch and 1 GFCI outlet. The outlet will be pre-wired and the post will be outfitted with a male cord at the bottom and female cord at the top of the post. 1 Lightswitch and 1 outlet box cover provided.)
TimberVolt-Inferno® (Post Drilled to 2 outlets with USB, double lightswitch/fan and 1 GFCI Outlet. The outlet will be pre-wired and the post will be outfitted with a male cord at the bottom and female cord at the top of the post. 1 Lightswitch and 1 outlet box cover provided.)
Drill for Power (Will include a lightbox or outlet box mortise in the post)

MOMENTS IN PARADISE™
Key Points of the TimberVolt® Series

• The TimberVolt® series has an electrical chase drilled from one-half to the entire length of the post to hide and protect all wiring.
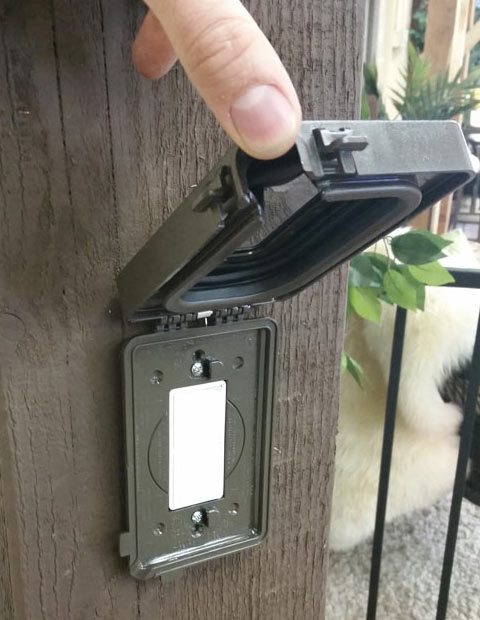
• Recessed boxes with weatherproof outdoor covers for plugs and switches are seamlessly incorporated into the actual timber post itself.
• The core hole through the center of the post, on the Phoenix and Firefly model, can be used for your electrician to run his own wiring, water lines for Water Misters, water taps, network cables, cat 5 lines, tv lines, etc. It is all concealed and out of sight and also offers protection from the elements. They all have electrical boxes with blank covers installed and ready for use.
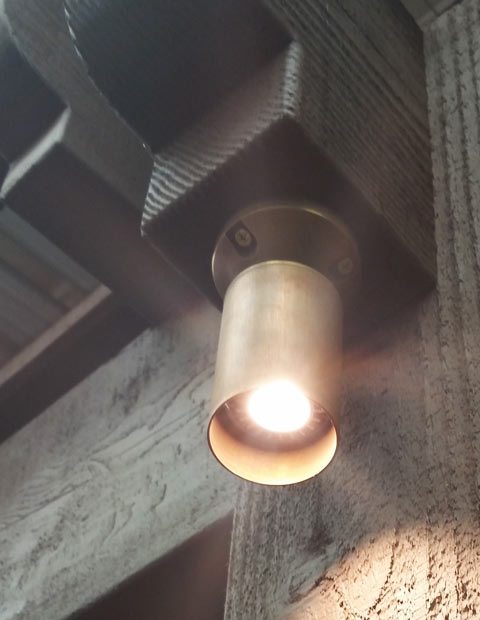
• The pre-wired Firefly, Phoenix, Dragon, and Inferno models all come with a custom steel insert on top to protect the wiring or water lines from being punctured from lags and hardware fasteners throughout the installation process. And, includes an electrical box on top with two electrical receptacles to prevent water and debris from going down inside the post. This also provides excellent access to lights, fans, and other accessories at the roof.
• The Dragon comes all pre-wired with about a 5′ male plug at the bottom, one GFI plug for your protection, one switch and one 6″ Female plug coming out of the top. Both cords come through the metal cover and both the GFI plugs and switch come with a weather cover protector.
• The Inferno model features:
- Recessed male plug with an upgraded weather cover
- One GFI plug for your protection with an upgraded weather cover
- One lower plug just above the GFI plug with two USB plugs in it
- One double switch (one for lights and one for fan) with upgraded weather cover halfway up the post.
- One upper TV plug with two USB plugs and upgraded weather cover.
- One separated plug on top of the post – one for lights and one for a fan. Both are on the double switch and have an upgraded weather cover.

Benefits of TimberVolt® Power Post
- Eliminates conduit, and/or nails
- Eliminates unsightly and unsafe exposed wire
- Eliminates the need to trench over power.
- Reduces the cost of, or even eliminates the need to hire an electrician
- Aesthetically pleasing
- Eliminates the chance of damaging a post trying to add electrical wiring to a post after it’s installed.
- Your structure is ready to use the moment it installed no need to wait for someone to wire it up.
- You can add as many TimberVolt® posts as needed in various configurations.
- The Dragon and the Inferno are protected with GFI plugs for your safety and your equipment.
- Easy grid-free power. The Dragon and Inferno models are a completely self-contained unit. Simply plug the male plug into a generator and you’re ready to go. For a silent application, we recommend a GOALZERO generator with a GOALZERO solar panel installed on top of your outdoor living structure and your ready to go.
- The Inferno model features integrated USB outlets; charge your smartphones, tablets, and other USB devices, while you watch movies on your outdoor TV that is plugged into one of the main electrical receptacles up top.

Many people are fascinated by the TimberVolt® electrical post and are intrigued as to how we drill a hole through the entire length of such a long post.
“Do you just drill it with a long drill bit?”
“Do you just bore it out?”
The simple answer is Yes!
But the actual process is pretty fascinating and requires a great deal of skill from an experienced timber wright craftsman and requires highly specialized proprietary equipment to “drill a hole” through the entire length of a heavy timber post.

How the TimberVolt® Post Series is Prepped for Power
1. Cut The Timber Post to Length
First, a timber wright will cut the post to length and carve out the required dovetails. Each post is cut by an experienced Western Timber Frame™ timber wright using large beam saws or oversized chop saws.
2. Carve Out Electrical Boxes
The placement of each electrical box is then marked out by hand. After the boxes are marked by the timber wright, each electrical box is carved out by hand using a special tool called a chain mortiser. Cutting out each electrical box takes between 7-45 minutes. The time varies widely depending on how many knots are present in each post, although the average time to carve out each electrical cavity is about 30 minutes.
3. Drilling the Power Core
Now that the boxes are in place, the timber wright is ready to drill the power hole through the core of the timber post.
The timber wright then measures and marks a center mark at the bottom and the top of the post in the center of the post. Then, using a set of proprietary guide jigs that are sized to either 6″, 8″, 10″, or 12″, the post is secured in place. Then, starting from the bottom, the heavy timber post is then drilled with a custom-made high strength horizontal bore drill. The drill bit itself is hollowed out to allow pressurized air to be fed down the length of the shaft to blow out wood chips and sawdust that is created as the core of post is bored out to make way for the electrical wiring.
The heavy, hollow-core drill has to be drilled and drawn out between 20 to 40 times to keep the drill bit from becoming lodged inside the post. However, on longer posts, or when knots are encountered, it can easily surpass 100 separate drill strokes to complete the process. This is a time-consuming process that is aggravated each time the bit encounters a knot in the post. Each of these hard knots can take 15-30 minutes for the bit to drill through.
Many times the timber wright is only able to progress 1/2″ with each pass into the post, and even less when knots are encountered. Compressed air is continually forced down the shaft of the bit to remove sawdust and wood chips with each stroke of the drill. Care must be taken to ensure that all sawdust and chips are removed or else the long drill bit can get stuck inside of the post. If the bit does become stuck in the post, then attempting to extract it can render the post unusable.
The natural grain and knots that are in each post effect the path of the drill bit as the hole for the electrical wire is bored out. As the post is bored out, the long drill bit tends to want to follow the natural grain. This causes the shaft of the long drill bit to drift off the center of the post. If the grain in the post has a sharp drift, there is a danger that the hole would drift from the center of the post and exit through the side of the post instead of boring out the middle.
The timber wright must take great care to not allow the bit to bore out the side of the post. As the bit gradually bores out the access hole it eventually encounters the electrical box cavities that were first carved into the post. The timber wright carefully guides the bit through each of these electrical box cavities. These cavities are a good visual aid for the timber wright to assess if the drill is staying in the center of the post.
Once the post has been drilled approximately halfway through, the timber wright carefully backs the boring drill bit back out of the post. He then removes the post from the guide jigs. On the Firefly upper and lower model, the access hole is now complete as they only require drilling an electrical chase halfway through this intense process. For these models, the post is then removed from the guide jigs. It is now ready to install electrical boxes and access covers.
The posts on the Phoenix, Dragon, and Inferno models have only half of the electrical power access holes they need. Therefore, the timber wright will then need to turn the post around to drill the other side and secure it back into the guide jigs. The process is then started again to complete the process of boring a hole in the timber post. Drilling the post’s electrical hole from both directions helps decrease the chances of the bit drifting off center.
NOTE: Despite the care taken by the timber wright, sometimes the drill will still end up breaking through the side of the post rendering the post unusable. The timber wright is then forced to start the process over and an expensive post is now discarded.
Once the timber wright has completed this process, the post is then removed from the guide jigs and is now ready for wiring. Each half of the post takes between 30-45 minutes to drill but can take more time if hard knots are encountered in the process of drilling the post. Thus, each post takes an average of 90 minutes to drill the hole the entire length of an eight-foot-long post. Every foot over eight feet adds approximately 15 minutes per foot and greatly increases the risk of the hole blowing out the side of the post. The post is then sent through the staining process and stained.
4. Installing the Electrical Boxes & Wiring Protection Sleeve
Electrical boxes are secured into each electrical box cavity in the timber post.
Each box is constructed from thermoplastic to resist rust and will not conduct electricity. Each box also meets NEMA OS-2 and is fire rated and UL listed for safety (classified for 2-hour fire wall and/or fire ceiling box). The Dragon model has a horizontally mounted outdoor rated electrical box secured to the top of the post.
Then, a 12″ steel protection sleeve is installed in the core just prior to the wiring process. The protection sleeve is put in place to ensure the wire is protected when lags or screws are used in the post during installation.
5. Installing Electrical Wire, Switches, and Electrical Receptacles & Covers
The post is then wired with a UL listed proprietary main wire that is designed and rated for outdoor use. Each wire is individually insulated and a double layer of protection is provided by an all-weather vinyl jacket that is chemical, oil, and moisture resistant. Each of the electrical blades is reinforced to help prevent accidental bending or breaking.
The fish tape is fed through the post and attached to the wire, which is then carefully drawn through the core of the post to each corresponding electrical box. Once the wire is in place, the finish wiring is then completed on each electrical receptacle and switch, as well as the male plug when applicable.
Outdoor rated electrical covers are then secured over each plug and switch. Each cover is sealed with a synthetic gasket to protect it from the elements.
We use a Hubbell ML450Z Weatherproof, Expandable, Flat, In-Use Plastic Device Cover on the Dragon model. It is an extremely flexible outdoor rated cover that features 16-in-1 configurations. Revolutionary patented design expands from 1″ to 3.5″ to meet your while-in-use needs. Each of these covers is made from an ultra-rugged polycarbonate and synthetic neoprene rubber. It is sealed with a synthetic gasket.
6. Testing The Finished Timbervolt® Post
At this point, a final test is made of all electrical components. Each switch and plug is tested to ensure that it functions properly. The post is then ready for installation. Once it is installed as part of outdoor living space, the male plug can be simply plugged into an extension cord, generator, or permanently connected to a power supply.
Click HERE or Call Today for a Backyard Designing for Power Consultation! 877-870-8755

6. Testing The Finished Timbervolt® Post
At this point, a final test is made of all electrical components. Each switch and plug is tested to ensure that it functions properly. The post is then ready for installation. Once it is installed as part of outdoor living space, the male plug can be simply plugged into an extension cord, generator, or permanently connected to a power supply.